Scenic Draft 0.14 to 0.19: Patterns, Bump Fields, Primitives and Materials
scenic-draft is a TypeScript library for rendering 3D scenes in the browser. You describe the shapes and lighting, and it generates a shader to draw them.
Scenic Draft with React covered the library up to 0.13.0. Six releases followed, adding patterns, surface detail, shapes and more control over lighting.
Custom GLSL support in 0.19.0 has a separate post. Here we'll look at the other additions:
| Version | What landed |
|---|---|
| 0.14.0 | elongate, absorption, materials.emerald and amber |
| 0.15.0 | displace, iridescence, materials.pearl and oilSlick |
| 0.16.0 | patterns, and five primitives: revolve, link, pyramid, triPrism, roundCone |
| 0.17.0 | bumps, anisotropy, transparent renders, the brushed and hammered metals |
| 0.18.0 | subsurface, materials.mix, and the translucent, cloth and timber presets |
| 0.19.0 | tone and exposure, plus the custom GLSL in the other post |
The images below were rendered with the library in a headless browser and saved as files.
The examples use the fluent API, imported from scenic-draft-react.
Patterns
Before 0.16.0, each surface had one colour. A pattern lets us vary it with a function evaluated where a ray hits. The shader calculates the pattern directly, so there is no texture image to load.
A pattern value of 0 uses the base material; 1 uses the pattern's color, roughness and metallic. Values in between blend them. Omit roughness to keep the base material's roughness throughout.
| Pattern | Options, past the shared roughness, metallic and offset |
|---|---|
patterns.checker(color, options?) | scale, softness, projection, sharpness |
patterns.stripe(color, options?) | axis, scale, softness |
patterns.noise(color, options?) | scale, octaves, gain, lacunarity, contrast, projection, sharpness |
patterns.gradient(color, options?) | axis, from, to |
Here are a chequered floor, rough black stripes on polished gold, a noise pattern and a gradient up a column. The stripes change the finish as well as the colour:
pattern: patterns.stripe([0.04, 0.04, 0.05], {
  scale: 3,
  softness: 0.15,
  roughness: 0.9,
  metallic: 0,
})
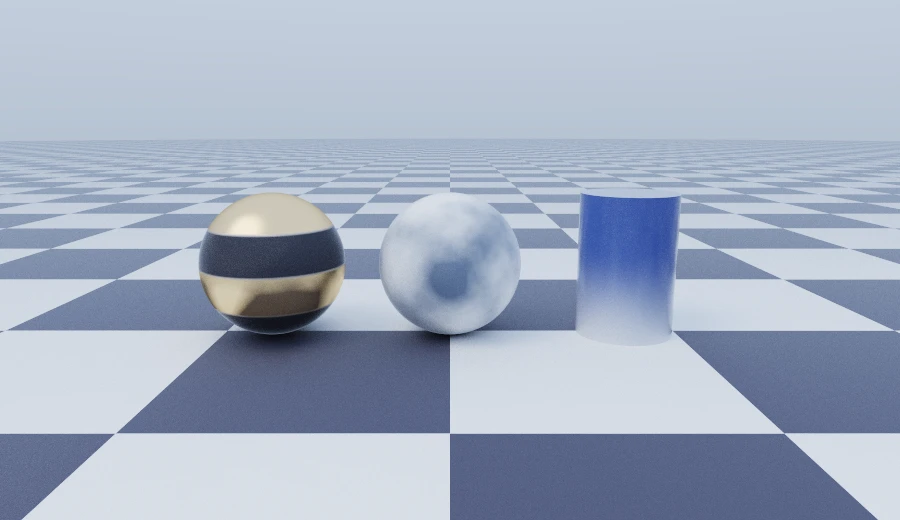
Patterns use the primitive's local coordinates, so they move with the shape. Repeated copies get the same pattern in the same position. Use offset to move the pattern across the surface.
Set pattern: null to remove a pattern. Omitting it inherits the enclosing material's pattern. The material presets explicitly use null, so they remain plain even inside a patterned group.
Solid and triplanar projection
checker and noise offer two ways to place a pattern on a surface:
'solid', the default, evaluates the pattern in 3D. Think of carving a shape from patterned stone.'triplanar'projects from all three axes and blends according to the surface normal. It takes three evaluations.sharpness, default 4, controls how quickly the blend changes between axes.
Here is the same checker pattern with each projection:
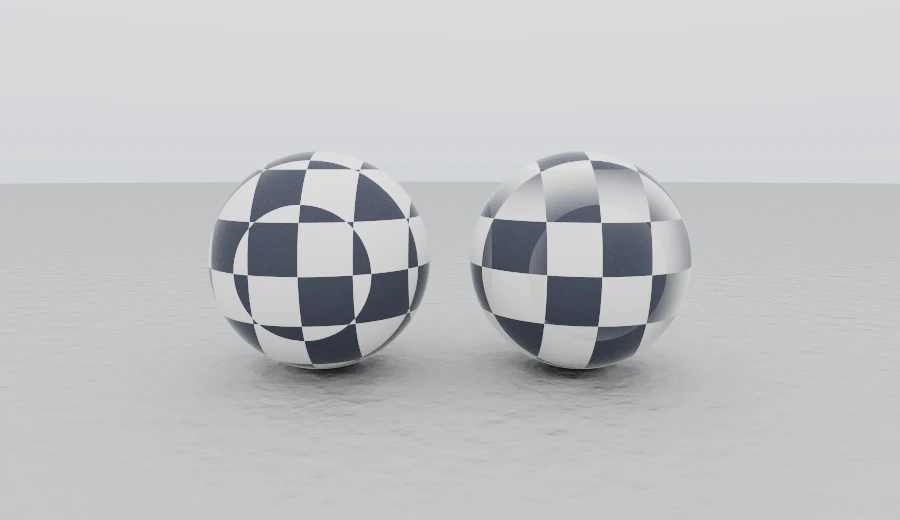
On the left, the sphere cuts through a 3D grid. On the right, the projected squares follow the surface more evenly. stripe and gradient don't need a projection setting, as they vary along one direction.
Bump fields
A bump changes the surface normal used for shading. It makes a surface look textured without changing the geometry or silhouette. Version 0.17.0 added three builders:
| Builder | |
|---|---|
bumps.noise(strength, options?) | fractal mottling: cast plaster, unglazed clay, orange peel. A Vec3 scale stretches it into a grain |
bumps.ridges(strength, options?) | the same field folded about its middle, so it creases: beaten copper, crumpled foil |
bumps.waves(strength, options?) | one sine ripple across axis, and no noise at all: corrugation, throwing rings |
Here are beaten copper, vertically stretched noise for a grain, and the materials.hammered preset, which uses ridges over metal:
sphere(0.72).paint({
  ...materials.copper,
  bump: bumps.ridges(0.45, { scale: 4 }),
})
sphere(0.72).paint({
  ...materials.chalk,
  bump: bumps.noise(0.4, { scale: [1, 22, 1] }),
})
sphere(0.72).paint(materials.hammered([0.72, 0.74, 0.78]))
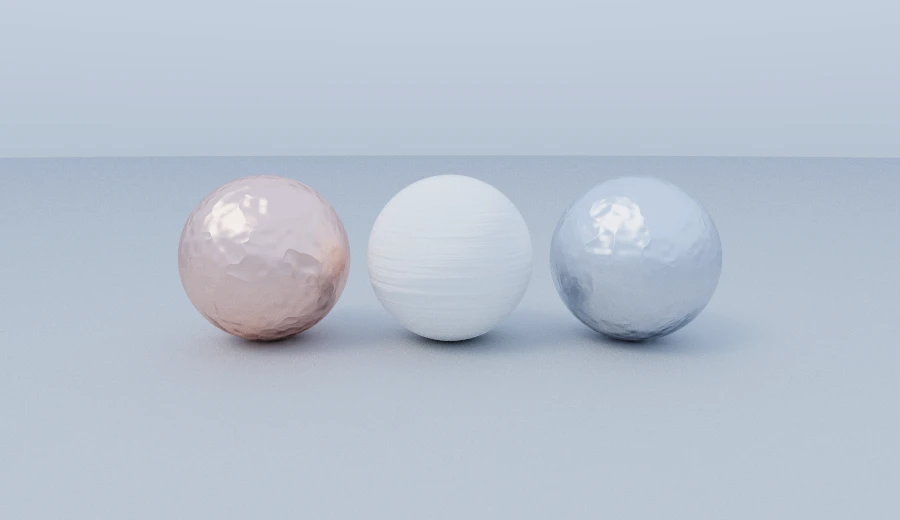
strength roughly controls the added slope. Try 0.1 for a subtle texture or 0.3 for a stronger one. Changing the scale keeps the apparent strength similar.
Bumps use world coordinates, while patterns use the shape's local coordinates. Repeated shapes therefore sample different parts of the bump field, which helps avoid identical-looking copies.
Bumps and displacement
displace (0.15.0) is the other way to get a texture. It adds a sine wave to the distance the subtree reports, so the surface actually moves.
sphere(0.75).displace(0.035, [13, 13, 13]) // all three axes: a golf ball
cylinder(0.34, 0.7).displace(0.03, [0, 30, 0]) // one axis: a thread
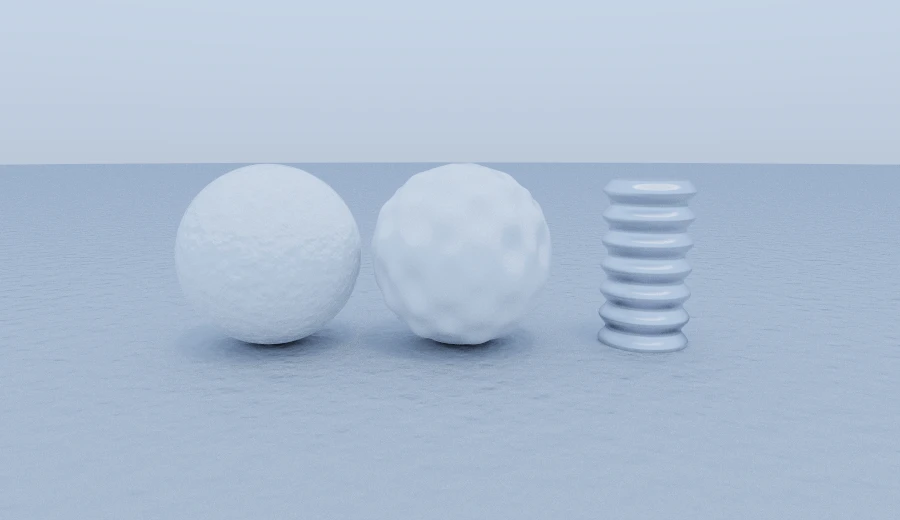
Compare the silhouettes: the left sphere has a bump, the middle sphere is displaced, and the column has a thread. A bump adds three small samples at a hit; displacement affects every tracing step.
For displace, the compiler divides by 1 + amplitude * |frequency| to keep steps safe. This means more steps are needed.
Frequency components are radians per world unit. A zero component leaves that axis out. One active axis gives ridges, two give a cross-hatch, and three give dimples.
For fine grain or hammering that doesn't need to alter the silhouette, use a bump. It is cheaper to render.
Solids of revolution
revolve(profile) rotates a closed 2D outline around the y axis. Each point is [radius, y]; the last connects back to the first. This is useful for cups, vases and other turned shapes:
// A goblet: a foot, a stem, a bowl, and the inside of the bowl coming back down.
revolve([
  [0, -0.95],
  [0.62, -0.95],
  [0.62, -0.85],
  [0.16, -0.6],
  [0.12, 0.05],
  [0.62, 0.5],
  [0.66, 0.95],
  [0.56, 0.95],
  [0.52, 0.56],
  [0, 0.16],
])

// A tyre: a profile that never touches the axis leaves a hole through the middle.
revolve([
  [0.6, -0.25],
  [0.95, -0.18],
  [0.95, 0.18],
  [0.6, 0.25],
])
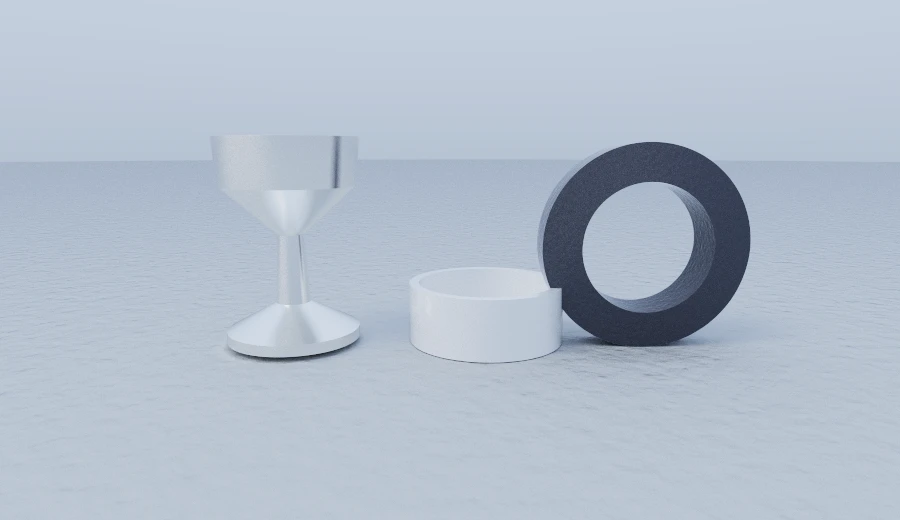
The distance calculation evaluates each profile segment, so a short profile can replace several combined primitives. A profile touching the axis closes the solid; one clear of it leaves a hole. Either point order works.
More primitives and elongation
Version 0.16.0 also added four primitives:
pyramid(radius, height), a square-based counterpart tocone.triPrism(radius, height), a triangular prism.roundCone(radius, tipRadius, height), a tapered shape with rounded ends.link(major, minor, height), an elongated ring.
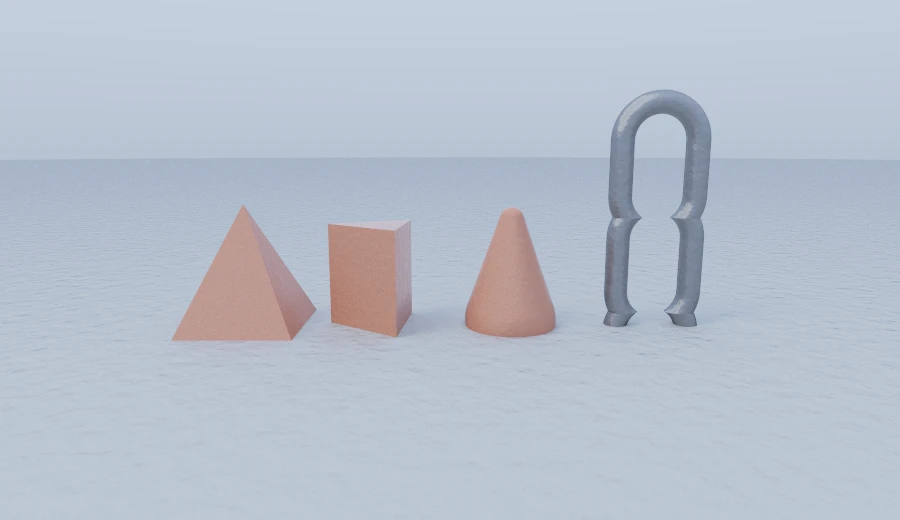
In 0.21.0, triPrism and link moved to scenic-draft-extras. Their arguments are unchanged.
The chain is one link and a bounded repeat:
link(0.36, 0.11, 0.26).repeat([0, 0.94, 0], [0, 1, 0])
You can also make a link with elongate(torus(major, minor), [height, 0, 0]). elongate separates a shape at the origin and fills the gap with copies of its central cross-section:
sphere(0.4).elongate([0, 0.62, 0]) // a capsule
torus(0.42, 0.11).elongate([0.3, 0, 0]) // a chain link
box([0.3, 0.3, 0.3], 0.09).elongate([0.55, 0, 0]) // a bar with the box's own corners
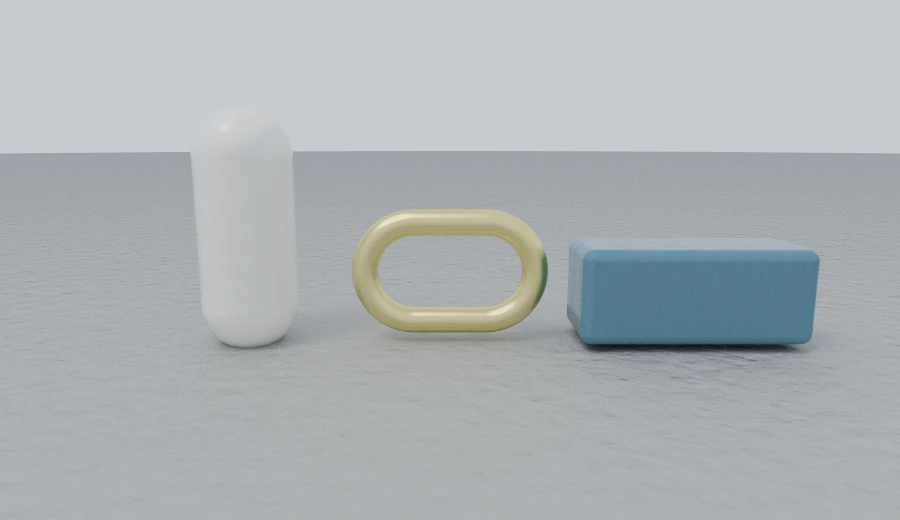
Unlike scaling, this preserves the shape of the ends. It adds one clamp to the shader without extra tracing steps. A zero component leaves that axis unchanged, and [0, 0, 0] returns the original shape.
Absorption and subsurface scattering
Two new material settings control what happens to light inside a solid.
absorption sets how much red, green and blue light is lost per world unit travelled inside the object. Thick parts become more strongly coloured while thin edges stay clearer. A green stone absorbs red and blue:
{
  color: [0.97, 1, 0.98], // the glass itself is all but colourless
  transmission: 1, ior: 1.55, roughness: 0.02,
  absorption: [1.9, 0.3, 1.2], // red and blue taken out per unit crossed
}
subsurface lets light scatter inside a material. This gives the cloudy, translucent appearance of jade or wax.
The renderer traces the ray through the solid. absorption reduces its brightness along the path, and internal surfaces can scatter it again or let it escape elsewhere.
An emerald and a piece of amber, then jade, alabaster and wax, with a low sun behind them:
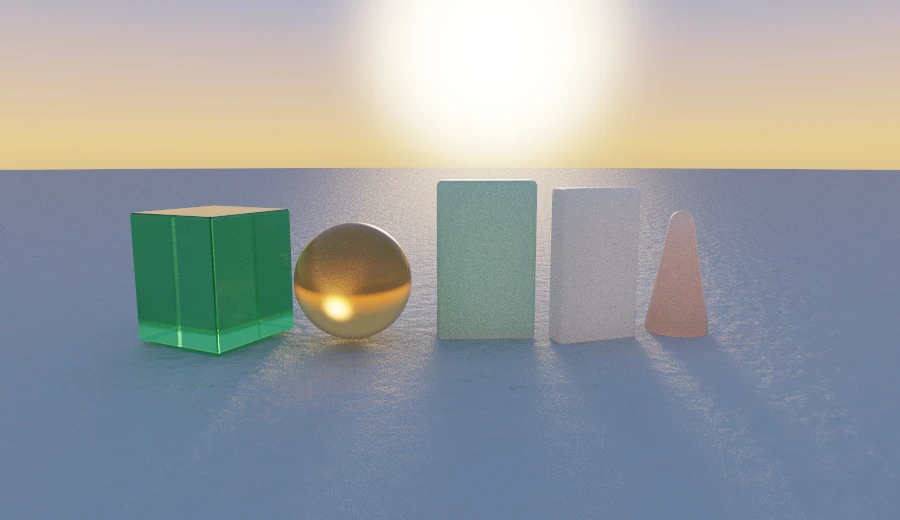
These materials often need bounces set to 8–12 instead of the default 6, so rays can escape the solid. If a translucent object looks flat and dark, try increasing the bounce count. absorption controls how much light survives inside it.
The new presets include emerald, amber, jade and alabaster, plus wax(color) and skin(color). The gemstones get their colour mainly from absorption through their volume.
Films and grain
The other two behaviours are about the reflection rather than what is under it.
iridescence models colour from thin-film interference, as seen on soap bubbles and oil slicks. Reflections from the film's two surfaces reinforce different wavelengths as the viewing angle changes.
iridescenceThickness defaults to 400nm. Around 200nm gives pale gold and blue; 400nm gives a broader range; above 800nm the bands become finer.
const film = {
  color: [0.03, 0.03, 0.035],
  roughness: 0.06,
  metallic: 0,
  iridescence: 1,
}
// The same black sphere twice: nothing you see off either is pigment.
paint(sphere(0.7), { ...film, iridescenceThickness: 220 })
paint(sphere(0.7), { ...film, iridescenceThickness: 700 })
anisotropy stretches highlights across a grain, as on brushed or turned metal. Fine grooves make the reflection spread at right angles to the brushing.
materials.pearl and materials.oilSlick, then a turned brass disc and a plain polished one of exactly the same metal:
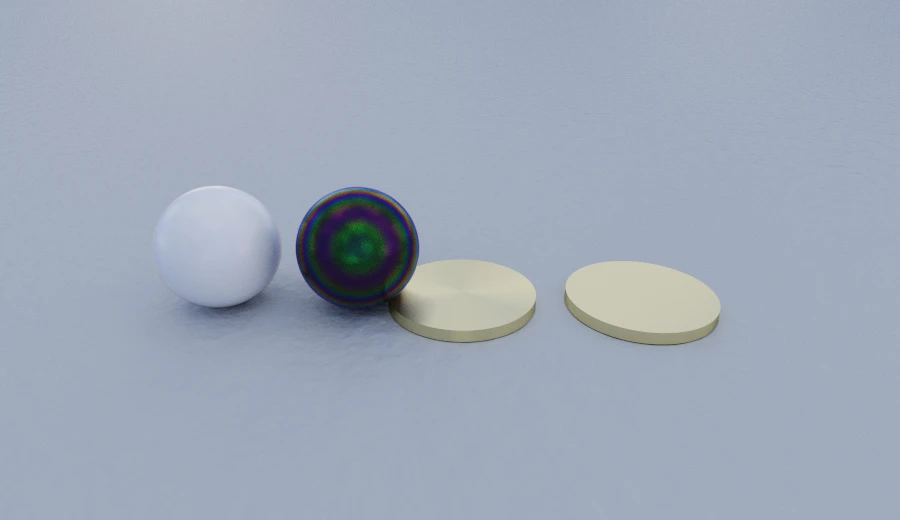
The pearl has a subtle gold-green effect, while the oil slick uses a near-black base. The left brass disc uses materials.turned; the right uses plain metal.
Their colour and roughness match. The turned version adds anisotropy: 0.8 and anisotropyRadial: true.
Radial grain is centred on the world origin, so position the turned face there. These effects also need something distinct to reflect. A broken sky works; a custom lighting environment gives more control.
Material presets and mixing
These releases bring the library to thirty material presets and sixteen functions. Many use the new patterns and bumps: brushed metals, concrete, leather, wood and cloth can now include surface detail.
| Metals | gold silver copper brass chrome steel brushedAluminium iron |
| Transmissive | glass frostedGlass water diamond emerald amber |
| Iridescent | pearl oilSlick |
| Translucent | jade alabaster |
| Opaque | porcelain marble concrete plaster terracotta chalk obsidian rubber leather wood |
| Cloth | linen denim |
| From a colour | matte plastic lacquer ceramic paintedWood fabric satin velvet wax skin tintedGlass metal brushed turned hammered glow |
| From two materials | mix(a, b, amount?) |
Here are wood, leather, linen, denim and a torus with a material made by mixing two presets:
materials.mix(materials.brass, materials.iron, 0.4) // a dulled brass
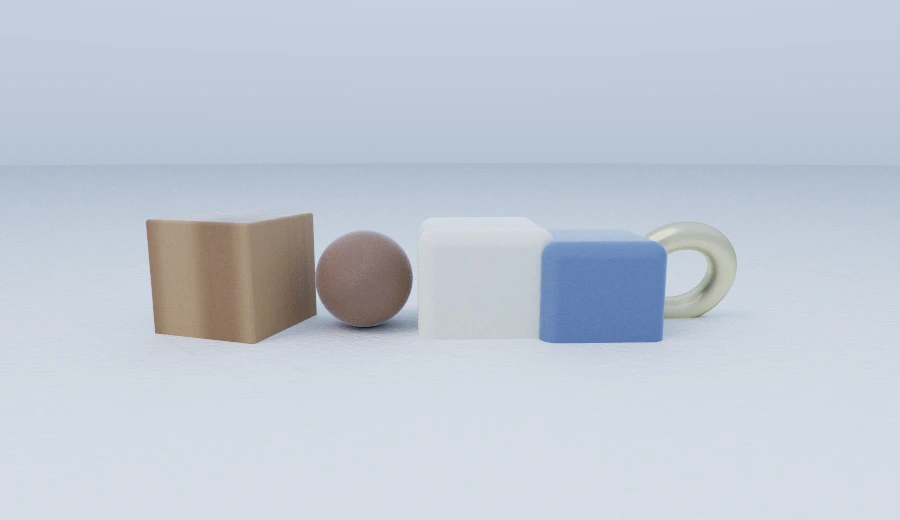
mix interpolates numbers and colours between two materials. Three fields cannot be blended this way: anisotropyRadial, pattern and bump are taken from whichever material the blend is closest to.
Exposure and tone
The tracer can produce brightness values far beyond the screen's range. exposure and tone, added in 0.19.0, control how these values become the displayed image.
exposure works in stops: increasing it by 1 doubles the light before tone mapping.
tone chooses the curve. 'aces' is the default, with stronger contrast and highlights approaching white. 'reinhard' is gentler. 'linear' applies no curve and clips values at 1.
Here is the scene with the default settings:
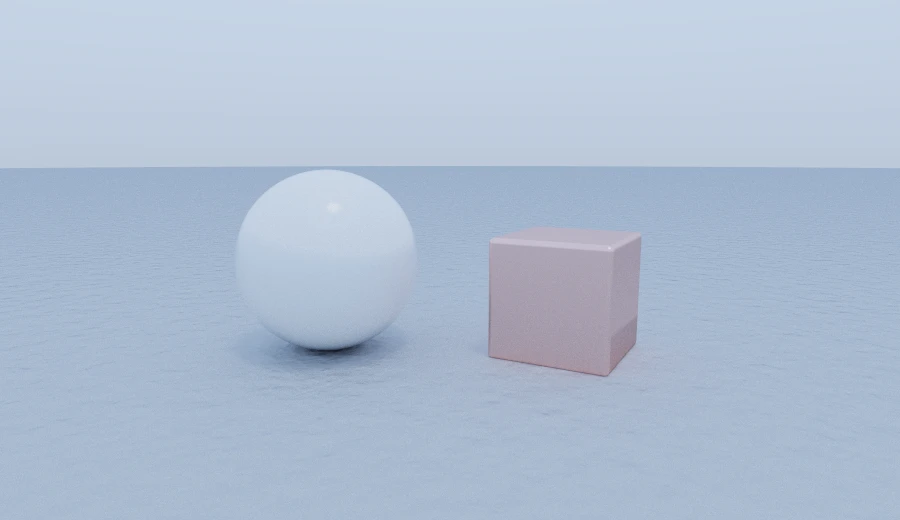
And with exposure reduced by two stops and tone: 'linear':
<SceneRenderer spec={spec} exposure={-2} tone="linear" />
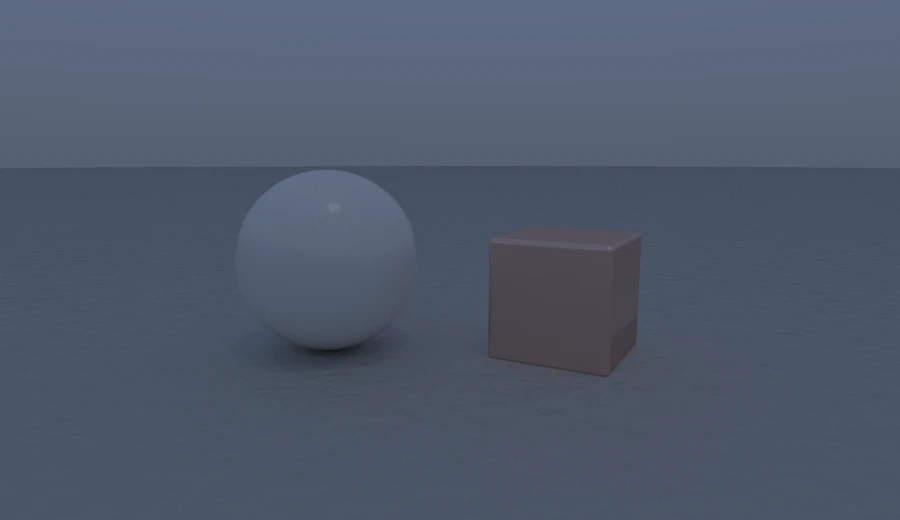
If a render is too bright or dark, try exposure first. It adjusts the whole image while preserving the lighting relationships. Changing individual material colours also changes the light they reflect.
Use 'linear' when you want to inspect values without a tone curve.
Both settings become constants in the display shader, so changing them requires another render() call.
Cut-outs
alpha: true makes empty parts of the image transparent. The environment still lights the scene and appears in reflections; it is simply hidden where a ray misses all geometry.
The canvas below is sitting on a gradient that belongs to this page, not to the scene:
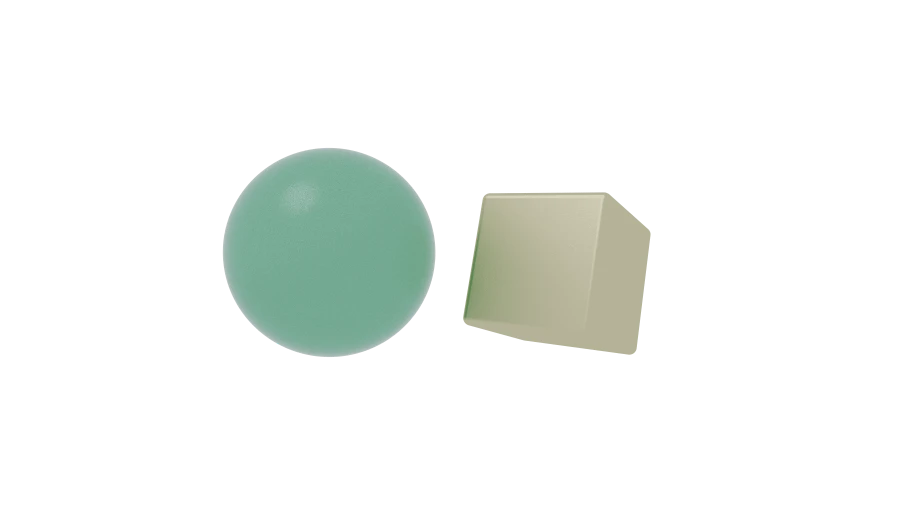
Partly covered edge pixels produce smooth, antialiased outlines. Glass remains part of the image, including what is visible through it.
The canvas preserves this alpha channel, so toDataURL('image/png') exports a transparent PNG for use in other designs.
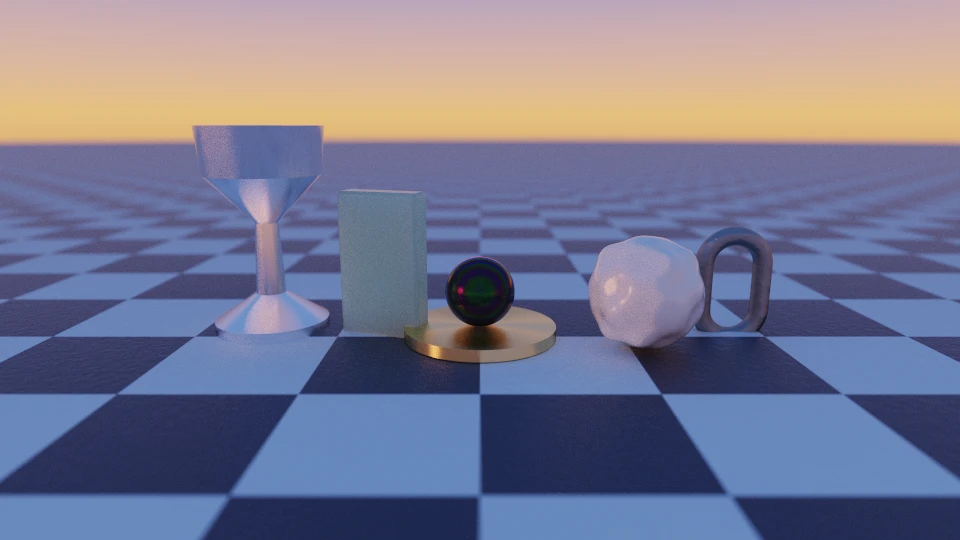
Putting it together
Let's combine these features: a brushed silver goblet, backlit jade, an oil slick on a turned brass tray, a hammered ball, a chain link and a triplanar chequered floor:
Installing
pnpm add scenic-draft       # the library, still dependency-free
pnpm add scenic-draft-react # the component, and both dialects with it
There is now much more control over surfaces: patterns vary colour and finish, bumps add small details, and new material settings change how light travels through and reflects from objects. Unused features are left out of the shader.
For effects beyond these options, 0.19.0 lets you write a custom shader function.
Documentation lives at scenic-draft.pages.dev.