
Scenic Draft with React
The previous scenic-draft posts used React to display 3D scenes. The setup is now available as scenic-draft-react.
So far we've covered repetition, materials and warps and backgrounds.
The React package handles the canvas, rendering and cleanup. It also exports a fluent API for writing scenes as method chains, which works nicely with autocompletion.
We'll look at three additions:
SceneRenderer, the React component.- The fluent API, for expressions such as
sphere(1).paint(materials.gold).translate([0, 1, 0]). repeatRadial,fogandrotate, added in versions 0.12–0.13.
The images here are saved renders. The background picker uses React to switch between five images; the accompanying code shows how to render the scene live.
Setup
pnpm add scenic-draft-react
This installs scenic-draft and scenic-draft-fluent as exact-version dependencies. The React package re-exports their APIs, so all examples below import from one place. React itself is a peer dependency.
Hello, scene
'use client'

import {
  backgrounds,
  camera,
  draft,
  materials,
  plane,
  SceneRenderer,
  sphere,
} from 'scenic-draft-react'

const HELLO = draft(
  sphere(1)
    .paint(materials.chrome)
    .union(plane([0, 1, 0], -1).paint(materials.concrete)),
  backgrounds.clouds,
).withCamera(camera([0, 1.1, -4.6], [0, 0, 0]).focalLength(40))

export function Hello() {
  return <SceneRenderer spec={HELLO} width={900} height={520} lazy />
}
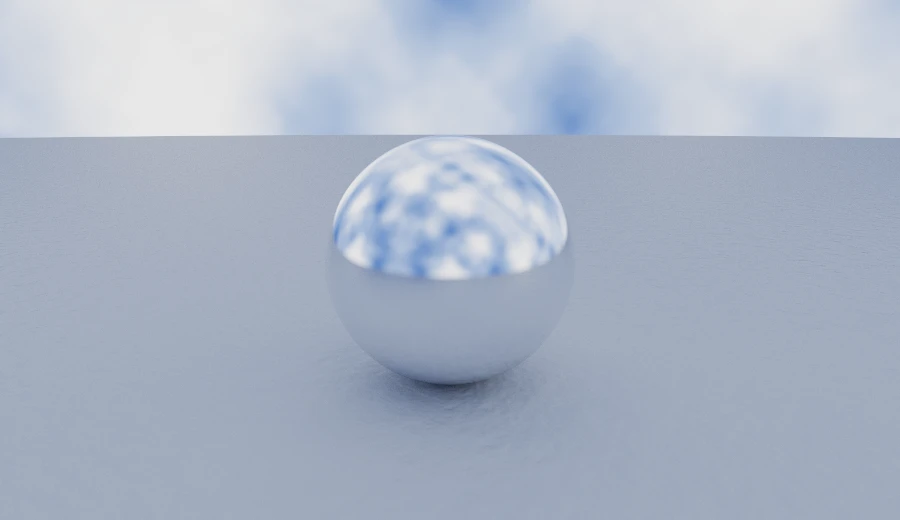
SceneRenderer renders one canvas and handles setup and cleanup. Other props pass through to the canvas, so we can add Tailwind classes for rounded corners and layout:
function Plate({ spec, width = 900, height = 520, bounces }) {
  return (
    <div className="my-6 flex justify-center">
      <SceneRenderer
        spec={spec}
        width={width}
        height={height}
        bounces={bounces}
        lazy
        className="w-full rounded-lg bg-black shadow-lg"
        style={{ aspectRatio: `${width} / ${height}` }}
      />
    </div>
  )
}
The props it does recognise are the render options and four callbacks:
| Prop | ||
|---|---|---|
spec | SceneSpec | Draft | The scene. Keep it stable; see below. |
size | number | Square backing resolution in pixels (default 1024). |
width height | number | Backing resolution, when it is not square. |
maxFrames | number | Samples per pixel to accumulate (default 1200). |
bounces | number | Light-bounce budget (default 6). |
seed | number | Fix the sample sequence for a reproducible image. |
lazy | boolean | Wait until the canvas is near the viewport. |
rootMargin | string | How early that is (default '300px'). |
onProgress | (frames, total) => void | After every accumulated frame. |
onDone | (frames) => void | When the accumulation finishes or stops. |
onError | (error) => void | The scene could not be traced at all. |
onContextLost | () => void | The browser reclaimed the context. |
width and height set the image resolution in pixels. CSS controls its displayed size. The wrapper above uses aspectRatio to keep the proportions while filling the column.
Two things are worth knowing before putting several of these on a page.
Keep spec stable. A new object triggers shader compilation and restarts rendering. Use module scope or useMemo, as shown below. Callbacks can be inline because the component reads them through refs.
Use lazy when a page has several scenes. It waits until the canvas is near the viewport before creating a WebGL2 context.
Browsers limit active contexts, often to around sixteen. For longer pages, also unmount scenes that have scrolled away. They release resources and render again when remounted.
If WebGL2 or EXT_color_buffer_float is unavailable, onError reports the failure. Use it to display a fallback that fits your page:
const [failed, setFailed] = useState(false)

return failed ? (
  <p>This browser can’t render the scene.</p>
) : (
  <SceneRenderer spec={HELLO} onError={() => setFailed(true)} />
)
The fluent API
Here is the die from the first post, written with ordinary function calls and then with method chains:
// nested, as scenic-draft has always been written
paint(
  subtract(
    intersect(box([1, 1, 1], 0.05), sphere(1.32)),
    bore,
    rotateX(bore, Math.PI / 2),
    rotateZ(bore, Math.PI / 2),
  ),
  materials.lacquer([0.5, 0.04, 0.05]),
)

// chained
box([1, 1, 1], 0.05)
  .intersect(sphere(1.32))
  .subtract(bore, bore.rotateX(Math.PI / 2), bore.rotateZ(Math.PI / 2))
  .paint(materials.lacquer([0.5, 0.04, 0.05]))
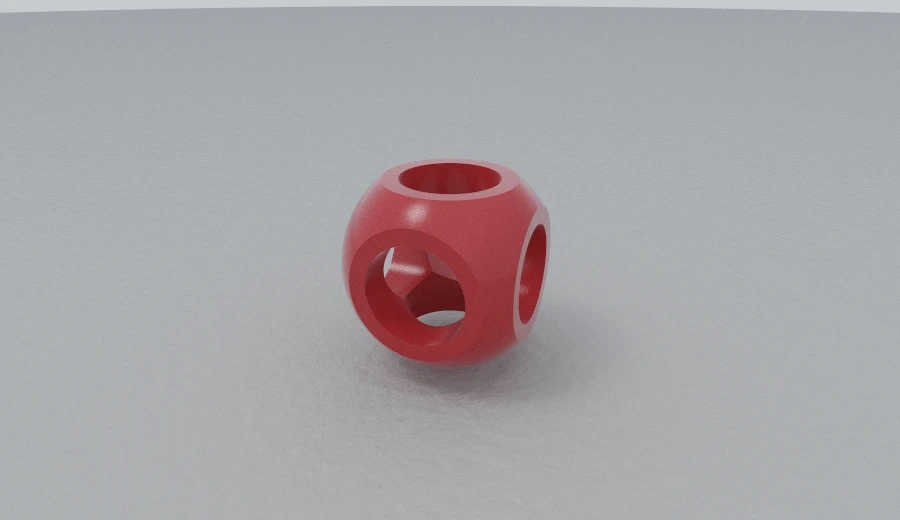
Both compile to the same shader. Chains often read well for several transforms on one shape. For a large group of sibling shapes, union(a, b, c) may be clearer.
A fluent Shape is also a SceneNode. It has the same data properties, with chaining methods on its prototype:
JSON.stringify(sphere(1)) // {"kind":"sphere","radius":1}
Object.keys(sphere(1)) // ['kind', 'radius']
You can pass a fluent shape into a core builder or use fluent(node) to start a chain from a plain node. The methods call the core builders, so they share the same validation.
Every operator that takes a subtree is also a method on one. a.union(b) is union(a, b), a.subtract(b) is subtract(a, b), and the smooth booleans keep the blend radius first, so a.smoothUnion(k, b) is smoothUnion(k, a, b).
There is one thing the chain does not do structurally, and it is the camera:
camera([0, 1.35, -4.9], [0, 0.05, 0]).focalLength(41).focus(10)
Camera is different: its methods have the same names as the fields they set. Use .toSpec() if you need a plain CameraSpec. The fluent scene builders and SceneRenderer accept either form and convert it for you.
Changing a scene with React state
draft(scene, background) creates a scene specification with methods for changing it: .withScene(), .withBackground(), .withCamera() and .withFog(). Each returns a new draft.
Let's use React state to change the background. First, define the shapes, materials and camera outside the component:
const STILL_LIFE = draft(
  FLOOR.union(
    sphere(0.7)
      .shell(0.05)
      .subtract(box([1, 1, 1]).translate([0, 1.1, 0]))
      .translate([-1.35, -0.32, 0])
      .paint(materials.porcelain),
    sphere(0.62).translate([0.2, -0.38, -0.2]).paint(materials.marble),
    box([0.42, 0.42, 0.42], 0.05)
      .translate([1.7, -0.58, 0.1])
      .paint(materials.copper),
    torus(0.42, 0.13)
      .rotateX(Math.PI / 2)
      .translate([-0.55, -0.87, -1.7])
      .paint(materials.obsidian),
  ),
  backgrounds.studio,
).withCamera(camera([0, 1.5, -6.6], [0, -0.25, 0]).focalLength(41))

export function Relight() {
  const [name, setName] = useState<BackgroundName>('studio')
  const spec = useMemo(
    () => STILL_LIFE.withBackground(backgrounds[name]),
    [name],
  )

  return (
    <>
      {names.map((option) => (
        <button key={option} onClick={() => setName(option)}>
          {option}
        </button>
      ))}
      <SceneRenderer spec={spec} width={720} height={440} bounces={8} lazy />
    </>
  )
}
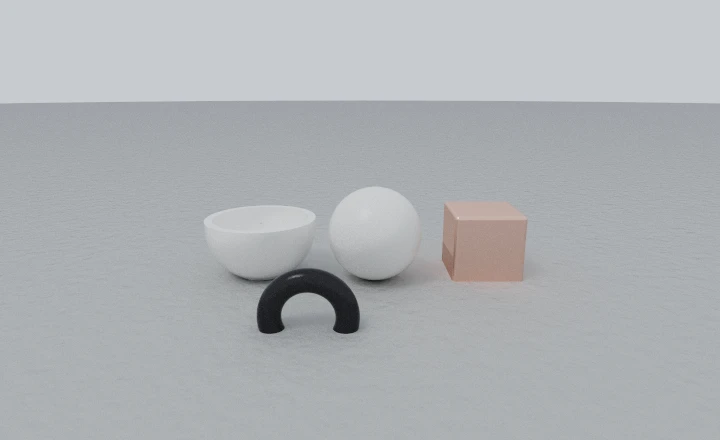
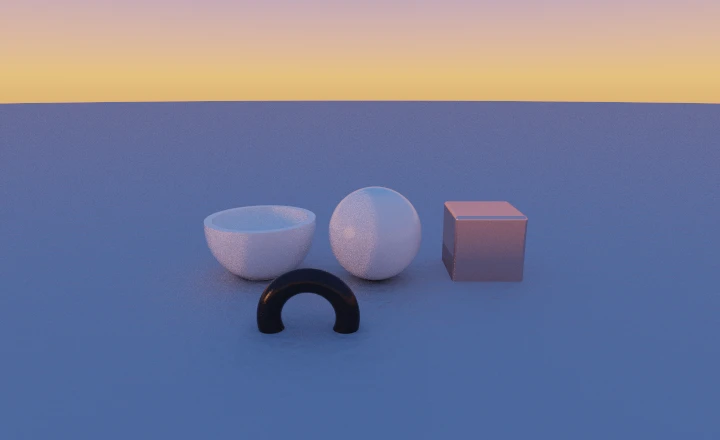
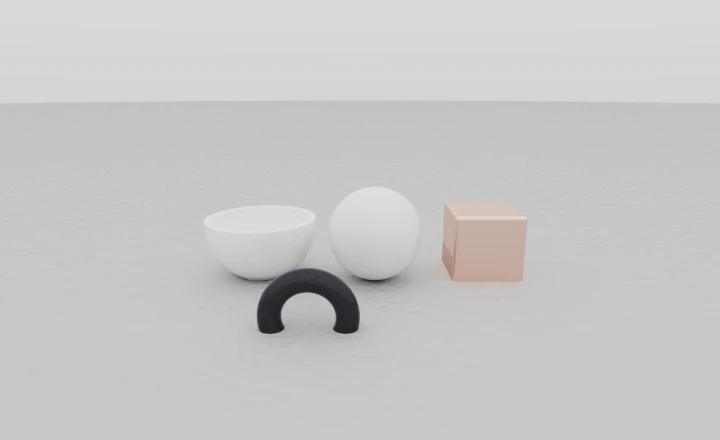
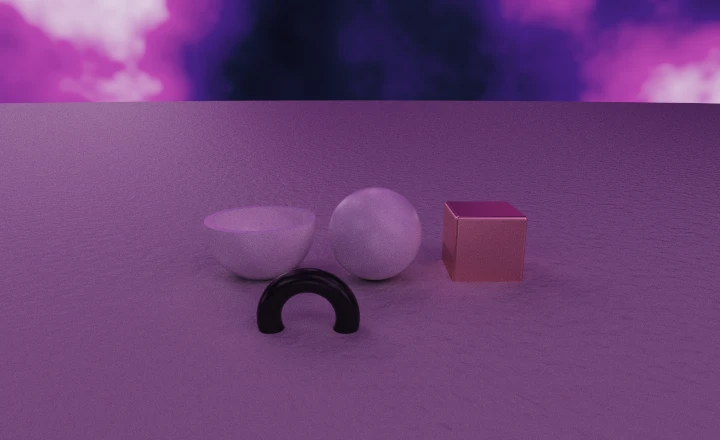
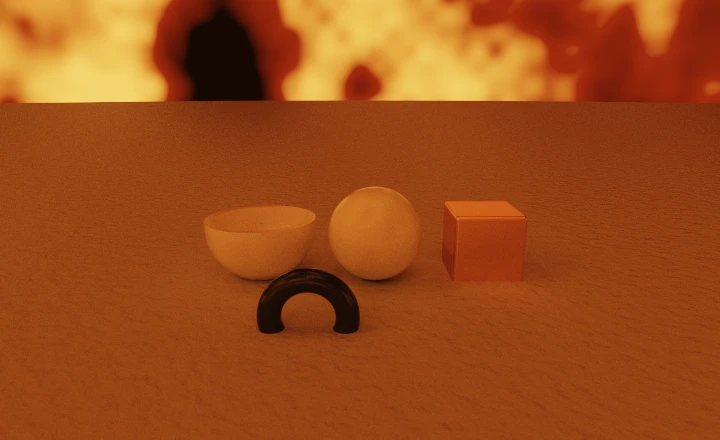
useMemo keeps the scene object stable until the selected background changes. Without it, unrelated component renders would also restart the scene.
The backgrounds change lighting as well as colour. For example, ember gets its light from bright patches in the noise sky.
repeatRadial
repeatRadial(node, count) repeats a shape around the y axis. It maps each query point into a wedge of 2π / count, giving evenly spaced copies from one description.
The wedge is centred on +x. Move the original shape out along x to set the radius. Here one cylinder makes fourteen columns, and one capsule makes a nine-armed rosette:
FLOOR.union(
  cylinder(0.16, 0.85)
    .translate([2.4, -0.15, 0])
    .repeatRadial(14)
    .paint(materials.marble),
  torus(2.4, 0.16).translate([0, 0.78, 0]).paint(materials.marble),
  sphere(0.4)
    .smoothUnion(
      0.16,
      capsule(0.11, 0.5)
        .rotateZ(Math.PI / 2)
        .translate([0.95, 0, 0])
        .repeatRadial(9),
    )
    .translate([0, -0.92, 0])
    .paint(materials.brass),
)
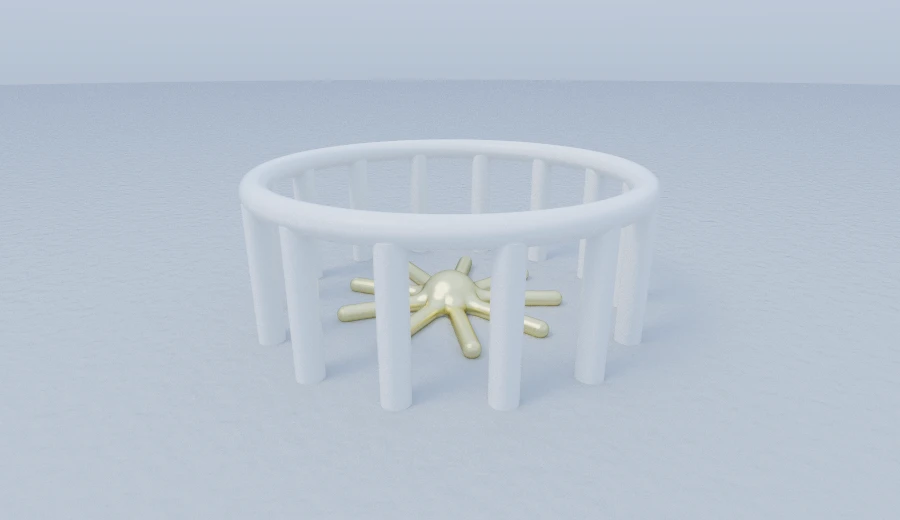
Here is the four-line calculation for the rosette:
float a1 = mod(atan(p.z, p.x) + 0.349066, 0.698132) - 0.349066;
float r2 = length(p.xz);
vec3 q3 = vec3(r2 * cos(a1), p.y, r2 * sin(a1));
The shader rotates the point into the wedge without stretching it. As with grid repetition, the shape should fit inside its cell.
The wedge is narrow near the axis, so move large shapes further out. Overlapping copies can leave seams near the centre. The rosette uses smoothUnion with a hub to soften that join.
fog
Version 0.13.0 added optional fog alongside scene, background and camera in the scene specification.
fog(color, density) adds haze between surfaces. First, here is a repeated and mirrored row of columns in clear air:
const AVENUE = draft(
  FLOOR.union(
    box([0.26, 1.5, 0.26], 0.04)
      .translate([2.4, 0.5, 0])
      .repeat([0, 0, 3.2])
      .mirrorX()
      .paint(materials.terracotta),
    sphere(0.55).translate([0, -0.45, -2.4]).paint(materials.chrome),
  ),
  backgrounds.daylight,
).withCamera(camera([0, 0.9, -13], [0, 0.35, 8]).focalLength(40))
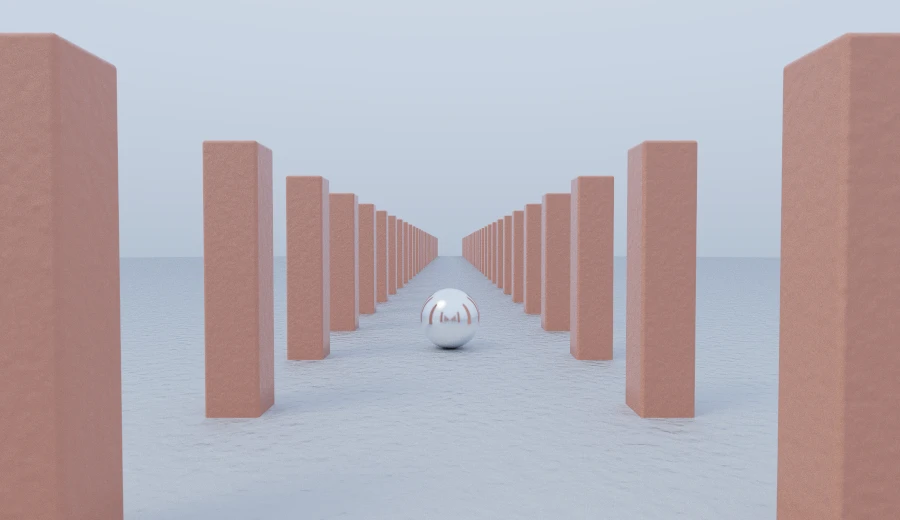
The columns get smaller with distance. Now let's add fog to make that distance more apparent:
AVENUE.withFog(fog([0.52, 0.56, 0.62], 0.055))
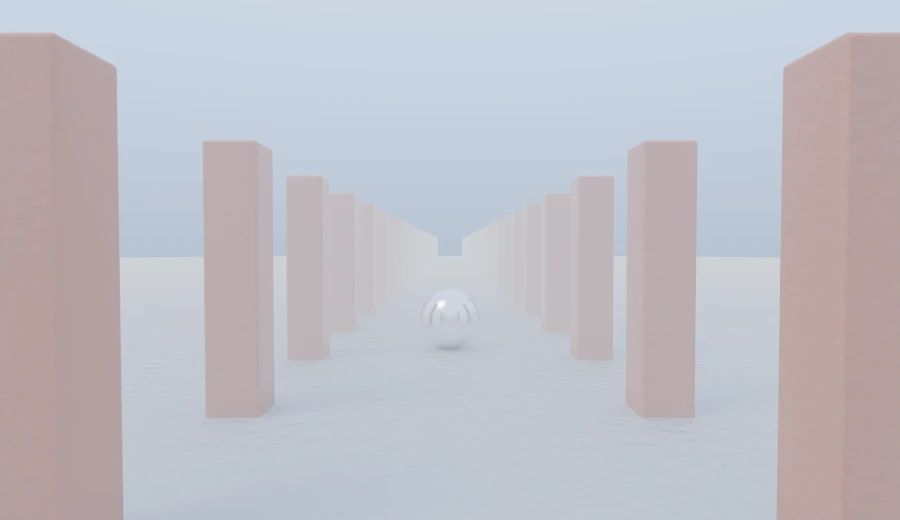
For each ray segment that reaches a surface, the renderer keeps exp(-density · length) of the incoming light and fills the rest with the fog colour. Longer paths show more haze:
// Haze over the stretch of air just crossed: what is beyond it is dimmed,
// and the fog's own colour takes the light it stopped. Depth, one exp() a
// hit. Only a stretch that ended on something is fogged — a ray that left
// the scene has gone to the environment, which is the light.
float fogT = exp(-fogDensity * (dist - segStart));
radiance += throughput * (1.0 - fogT) * fogColor;
throughput *= fogT;
A few details are useful when adjusting it.
Rays that escape to the background are unchanged, so fog does not dim the environment itself.
Fog colour represents light and can include values above 1. Match it to the horizon for distant haze, make it brighter for glare, or darker for smoke.
density controls how quickly the haze builds with distance. Try 0.03 for light outdoor haze or 0.15 for a smoky room. Above 0.5, nearby objects can become obscured. A value of 0 disables it.
This models absorption and added light without scattering rays through a volume. It is inexpensive, but cannot produce shafts of light through a window.
rotate
rotate(node, [x, y, z]) applies rotateX, then rotateY, then rotateZ. Zero or non-finite components are skipped:
box([0.4, 0.4, 0.4], 0.04).rotate([0.45, 0.7, 0.25])
rotate(node, [0, a, 0]) // exactly rotateY(node, a)
rotate(node, [0, 0, 0]) // exactly node
This is handy when the angles are already stored or calculated as a vector.
Putting it together
Let's combine eighteen repeated marble columns, glass, a rotated box, a noise sky, depth of field and fog:
draft(
  plane([0, 1, 0], -1)
    .paint(materials.obsidian)
    .union(
      cylinder(0.14, 0.95)
        .translate([3.1, -0.05, 0])
        .repeatRadial(18)
        .paint(materials.marble),
      torus(3.1, 0.14).translate([0, 0.95, 0]).paint(materials.marble),
      sphere(0.85).translate([0, -0.15, 0]).paint(materials.glass),
      box([0.32, 0.32, 0.32], 0.04)
        .rotate([0.45, 0.7, 0.25])
        .translate([1.85, -0.62, -0.4])
        .paint(materials.copper),
      capsule(0.16, 0.4)
        .rotate([Math.PI / 2, 0, 0.4])
        .translate([-1.9, -0.8, -0.6])
        .paint(materials.brass),
    ),
  noise(
    [
      [0.05, 0.04, 0.09],
      [0.24, 0.14, 0.32],
      [0.95, 0.5, 0.24],
      [1.5, 1.05, 0.7],
    ],
    {
      scale: 1.8,
      octaves: 5,
      contrast: 1.15,
      sun: sun([-0.6, 0.3, -0.35], [12, 7, 3.2], 200),
    },
  ),
)
  .withCamera(
    camera([0, 0.75, -6.4], [0, 0.1, 0.3])
      .lens(43, 3.2)
      .worldUnit(100)
      .focus(6.3),
  )
  .withFog(fog([0.24, 0.16, 0.22], 0.05))
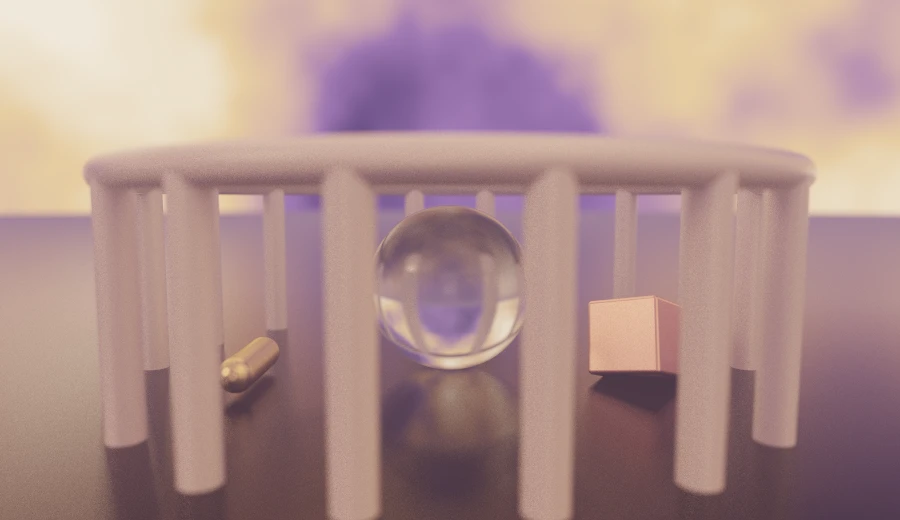
Rendered with bounces={12}, because glass spends one on every surface it crosses.
Rendering without the component
The package also re-exports render(canvas, spec, options) for use with your own canvas. Call the returned handle's stop() during cleanup.
buildShader(spec) returns the generated GLSL without needing a GPU. The fragments shown here came from draft(...).shader() in a Node script.
Installing
pnpm add scenic-draft-react   # the component, and both dialects with it
pnpm add scenic-draft-fluent  # the chain, without React
pnpm add scenic-draft         # the original, still dependency-free
If you prefer separate imports for the core and fluent APIs, use these subpaths:
import * as core from 'scenic-draft-react/core' // exactly scenic-draft
import * as fluent from 'scenic-draft-react/fluent' // exactly scenic-draft-fluent
The React component and fluent API use the same renderer and scene data as the core library. Choose whichever style suits the example; you can also mix plain nodes and fluent shapes.
Documentation lives at scenic-draft.pages.dev, including a page on the React package with live examples in both dialects.